Blog
How to setup an Angular 2 and TypeScript project with Visual Studio 2017
You can see the source code of this tutorial on my GitHub repository, here : Angular2 web app source code on GitHub.
Versions :
- ASP.NET Core : 1.1.0
- Angular : 2.2.0
- TypeScript : 2.0.0
- Visual Studio : 2017 RC
Create new ASP.NET Core web application
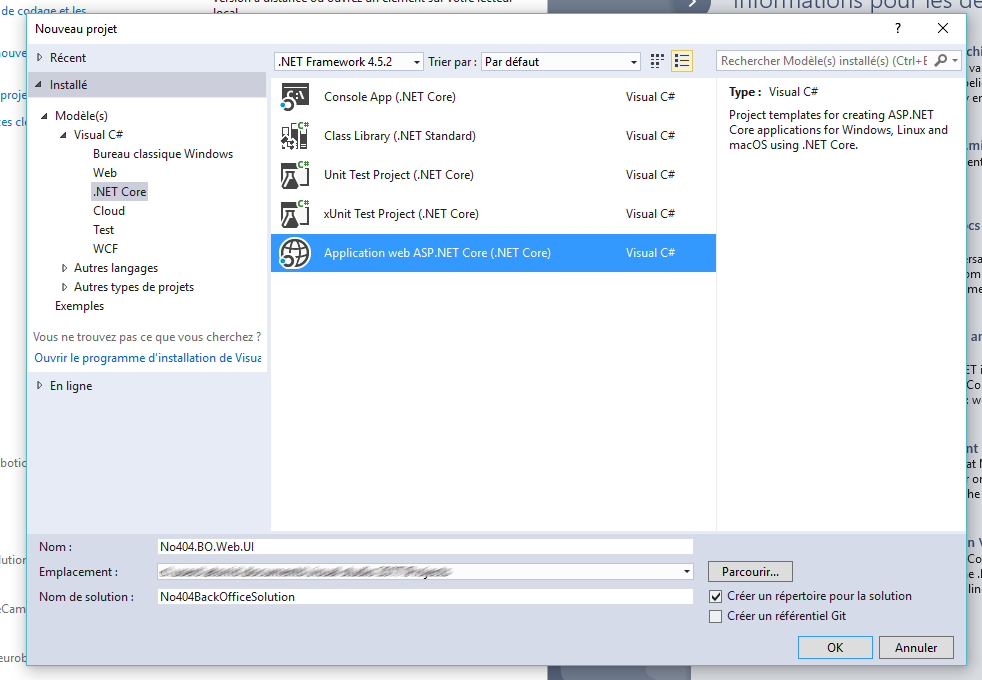
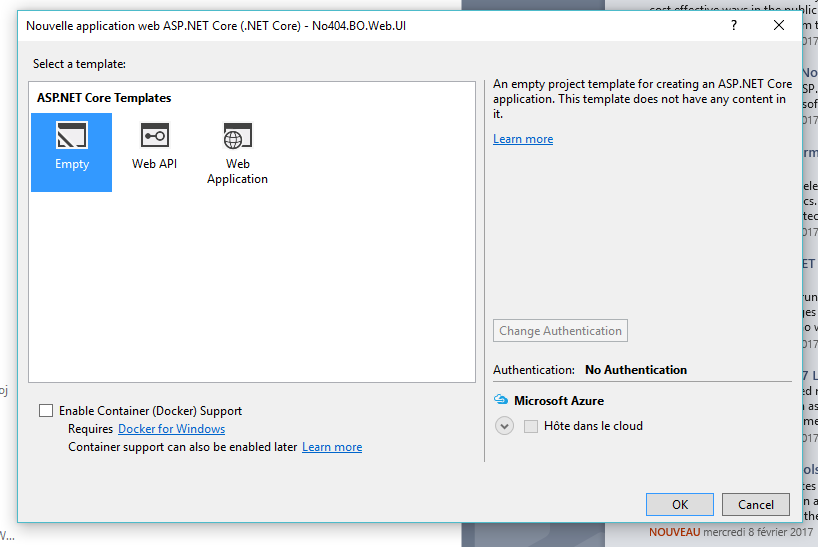
- Choose an empty project to start from zero
- Choose no authentication
- Don't enable the docker container support (I will make a tutorial on Docker next)
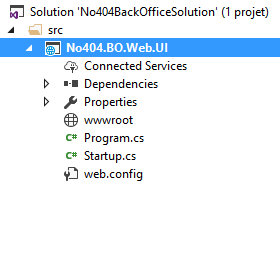
Create the MVC folders structure
What is MVC ?
MVC, for Model-View-Controller is an architectural pattern who separates an application into three main components :
- The Model
- The View
- The Controller
The purpose of this architectural pattern is to build applications that are easily maintenable and testable, separating differents components. A best practice is to pair this architectural pattern with an N-Tier layers architecture.
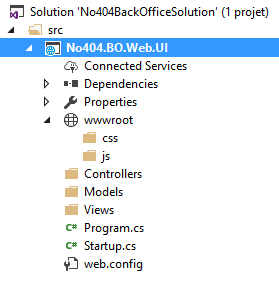
- Create the folder "Models", who contains classes that represent some data, validation logic and business rules
- Create the folder "Views", who contains views who are the components that displays the user interfaces
- Create the folder "Controllers", who contains the controllers, classes that handles the browser requests. Controllers handles and responds to user input and interaction
- Create the "wwwroot" subfolders, who contains static files to serve, like JavaScript files, css and images
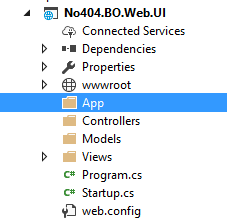
Create a folder where put the TypeScript files
Set TypeScript configuration
If TypeScript is the primary language for Angular application development, it can't be executed by the browsers directly; TypeScript must be "transpiled" into JavaScript using the tsc compiler, which requires some configuration.
To configure the TypeScript compiler and set your environment, you have two files to add :
- tsconfig.json, the TypeScript compiler configuration file
- typings, the TypeScript type definition files file
tsconfig.json
The TypeScript configuration file is required to guide the TypeScript compiler as it generates JavaScript files which are used by the browser.
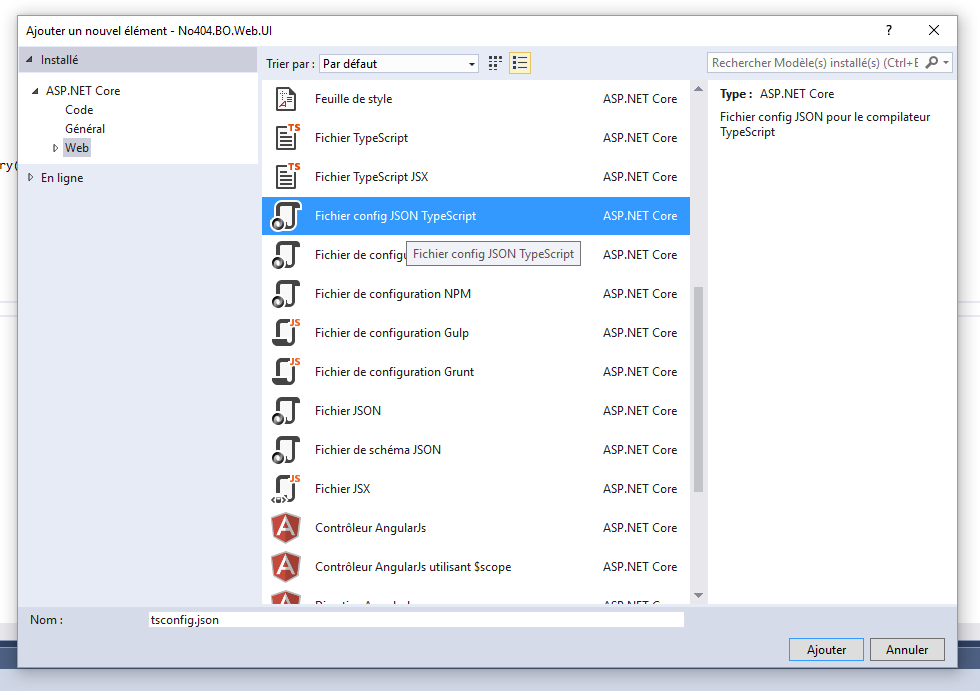
This is the default content when you add the tsconfig.json file to your project :
{
  "compilerOptions": {
    "noImplicitAny": false,
    "noEmitOnError": true,
    "removeComments": false,
    "sourceMap": true,
    "target": "es5"
  },
  "exclude": [
    "node_modules",
    "wwwroot"
  ]
}
So, what do we have in this file ?
The compilerOptions section is optional, if its null default values will be use. You can find the details of this section here : http://www.typescriptlang.org/docs/handbook/compiler-options.html
If you want more information about this file, you can read the documentation : http://www.typescriptlang.org/docs/handbook/tsconfig-json.html
For our project, we have to specify where the tsc can find our TypeScript files and where we want it generates the JavaScript files, and some other settings. This is the content we need :
{
  "compilerOptions": {
    "target": "es6",
    "module": "commonjs",
    "moduleResolution": "node",
    "sourceMap": true,
    "emitDecoratorMetadata": true,
    "experimentalDecorators": true,
    "removeComments": true,
    "suppressImplicitAnyIndexErrors": true,
    "rootDir": "App",
    "outDir": "wwwroot/app"
  },
  "compileOnSave": true,
  "angularCompilerOptions": {
    "genDir": ".",
    "debug": true
  },
  "exclude": [
    "node_modules",
    "wwwroot"
  ]
}
TypeScript type definition files
Many JavaScript libraries, such as jQuery, extend the JavaScript environment with syntax and features that the TypeScript compiler doesn't recognize natively. This file tell the compiler about the libraries you load.
{
  "globalDependencies": {
    "jquery": "registry:dt/jquery",
    "jasmine": "registry:dt/jasmine"
  }
}
Add a NPM configuration file
What is NPM ?
NPM, for Node Package Manager, is a utility that aids JavaScript open source package installation, version and dependency management. NPM is distributed with Node.js, which is an asynchronous event driven JavaScript runtime, designed to build scalable network applications.
Angular 2 and its dependencies are delivered through NPM, so you need to add the NPM configuration file in your project, package.json.
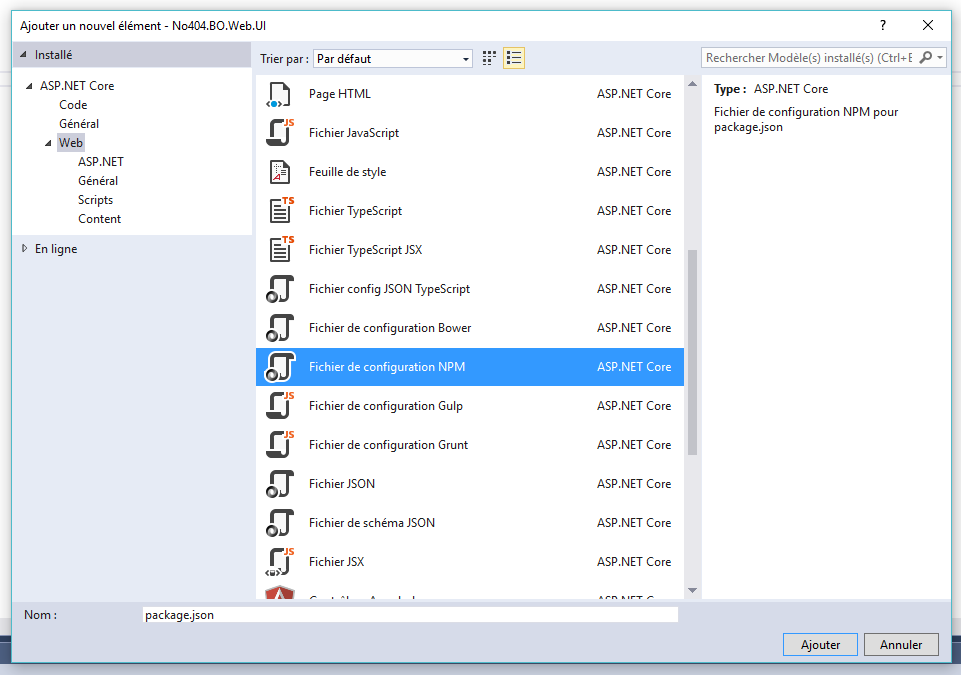
You will have an empty NPM configuration file :
{
  "version": "1.0.0",
  "name": "asp.net",
  "private": true,
  "devDependencies": {
  }
}
To add Angular 2 and its dependencies to your projects, you have to add some dependencies in your NPM configuration file :
{
  "version": "1.0.0",
  "description": "NO404 administration panel",
  "name": "no404 backoffice",
  "readme": "no404 backoffice",
  "license": "MIT",
  "dependencies": {
    "@angular/common": "~2.2.0",
    "@angular/compiler": "~2.2.0",
    "@angular/core": "~2.2.0",
    "@angular/forms": "~2.2.0",
    "@angular/http": "~2.2.0",
    "@angular/platform-browser": "~2.2.0",
    "@angular/platform-browser-dynamic": "~2.2.0",
    "@angular/router": "~3.2.0",
    "@angular/upgrade": "~2.2.0",

    "angular-in-memory-web-api": "~0.1.15",
    "core-js": "^2.4.1",
    "reflect-metadata": "^0.1.8",
    "rxjs": "5.0.0-beta.12",
    "systemjs": "0.19.39",
    "zone.js": "^0.6.25",

    "bower": "1.7.9",
    "jquery": "^3.1.0"
  },
  "devDependencies": {
    "@types/core-js": "^0.9.34",
    "@types/node": "^6.0.45",
    "concurrently": "^2.2.0",
    "gulp": ">=3.9.1",
    "gulp-concat": ">=2.5.2",
    "gulp-copy": ">=0.0.2",
    "gulp-cssmin": ">=0.1.7",
    "gulp-load-plugins": "^1.3.0",
    "gulp-rename": ">=1.2.2",
    "gulp-rimraf": ">=0.2.0",
    "gulp-tsc": ">=1.2.0",
    "gulp-uglify": ">=1.2.0",
    "gulp-watch": ">=4.3.9",
    "gulp-clean-css": "^3.0.4",
    "gulp-clean": "^0.3.2",
    "jasmine-core": "2.4.1",
    "tslint": "^3.15.1",
    "typescript": "^2.0.0",
    "typings": "^1.3.2"
  },
  "scripts": {
    "start": "concurrently \"npm run gulp\" \"npm run watch\" \"npm run tsc:w\"",
    "postinstall": "typings install",
    "tsc": "tsc",
    "tsc:w": "tsc -w",
    "typings": "typings",
    "gulp": "gulp",
    "watch": "gulp watch",
    "ngc": "ngc"
  }
}
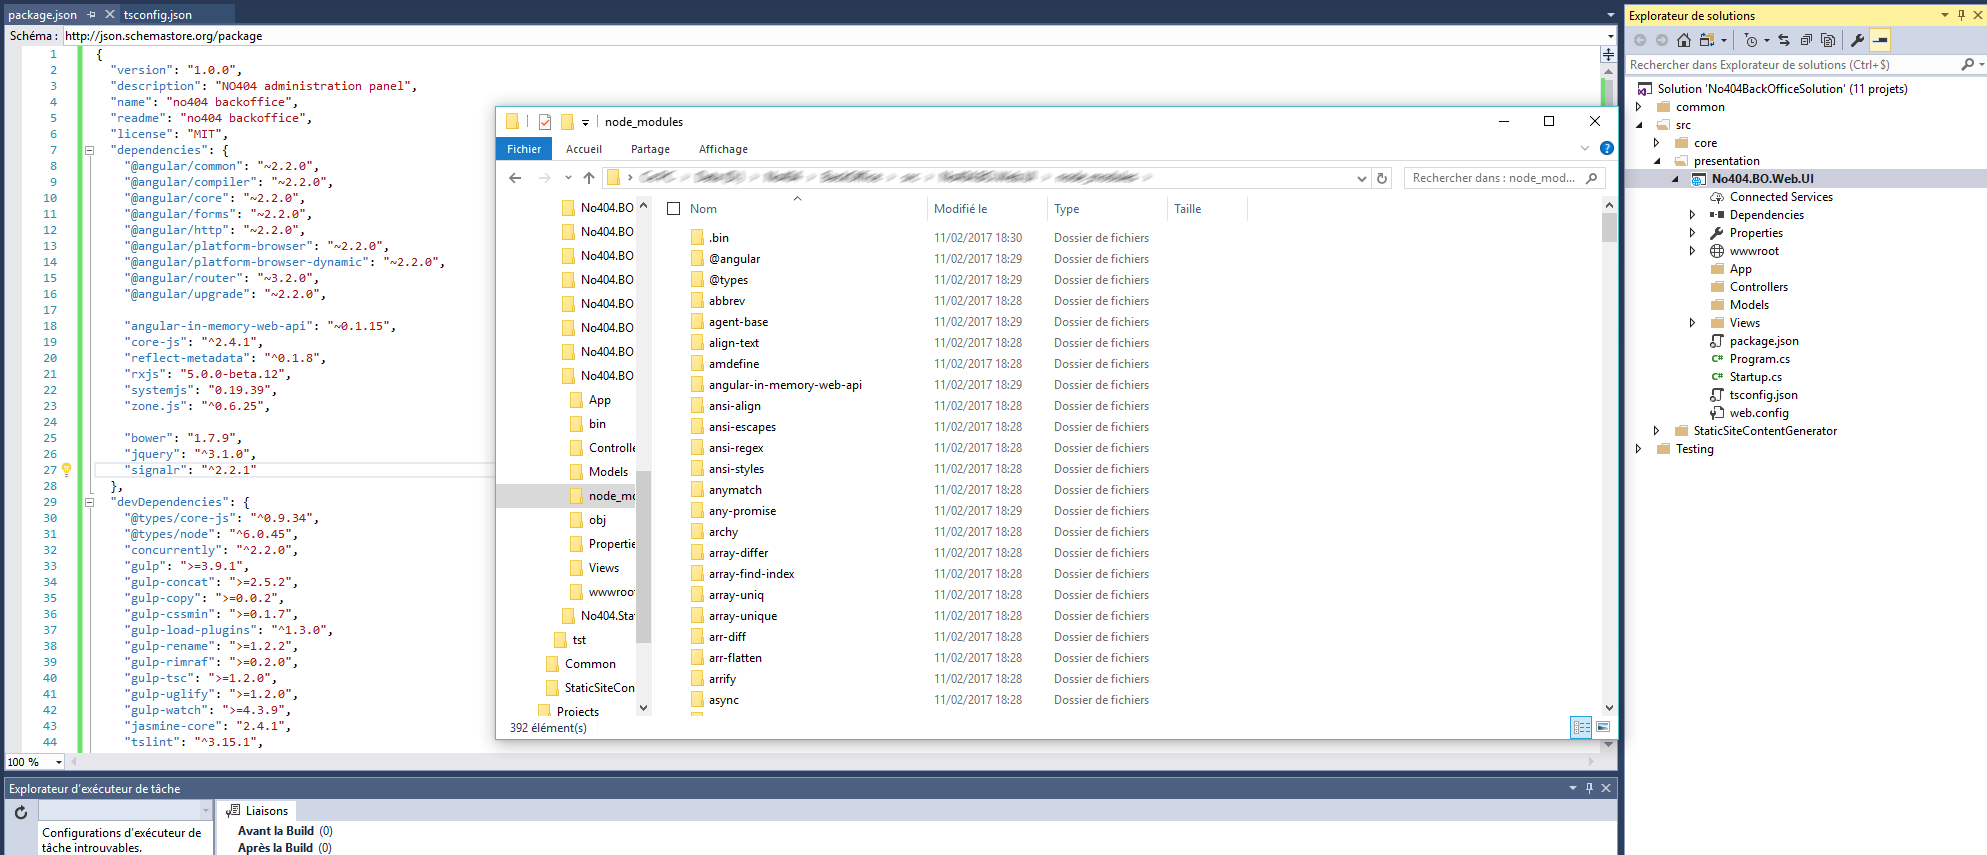
If you open your web application in the folder explorer, you can now see a node_modules folder with some external dependencies in there :
Add Gulp
Add gulp.config.js
module.exports = function () {

    var base = {
        webroot: "./wwwroot/",
        node_modules: "./node_modules/"
    };

    var config = {
        /**
         * Files paths
         */
        angular: base.node_modules + "@angular/**/*.js",
        app: "App/**/*.*",
        appDest: base.webroot + "app",
        js: base.webroot + "js/*.js",
        jsDest: base.webroot + 'js',
        css: base.webroot + "css/*.css",
        cssDest: base.webroot + 'css',
        lib: base.webroot + "lib/",
        node_modules: base.node_modules,
        angularWebApi: base.node_modules + "angular2-in-memory-web-api/*.js",
        corejs: base.node_modules + "core-js/client/shim*.js",
        zonejs: base.node_modules + "zone.js/dist/zone*.js",
        reflectjs: base.node_modules + "reflect-metadata/Reflect*.js",
        systemjs: base.node_modules + "systemjs/dist/*.js",
        rxjs: base.node_modules + "rxjs/**/*.js",
        jasminejs: base.node_modules + "jasmine-core/lib/jasmine-core/*.*"
    };

    return config;
};
Add the gulp configuration file
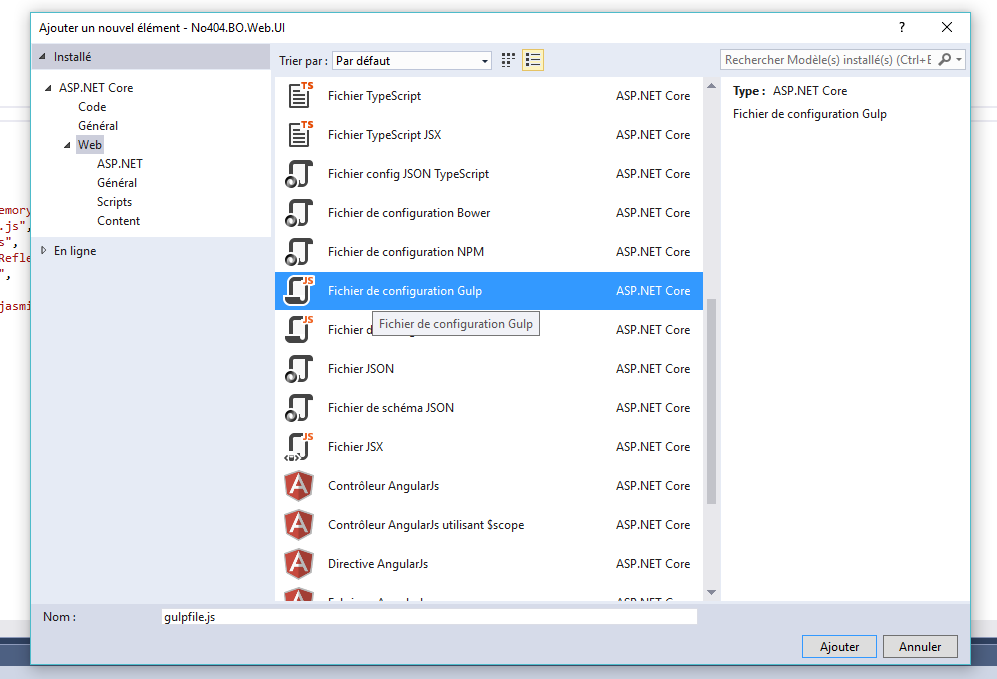
/*
This file is the main entry point for defining Gulp tasks and using Gulp plugins.
Click here to learn more. https://go.microsoft.com/fwlink/?LinkId=518007
*/

var gulp = require('gulp');

gulp.task('default', function () {
    // place code for your default task here
});
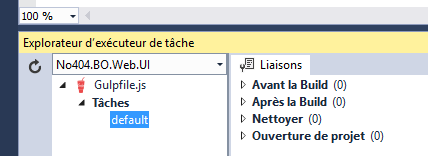
/// You can see now a task "default" in the task explorator
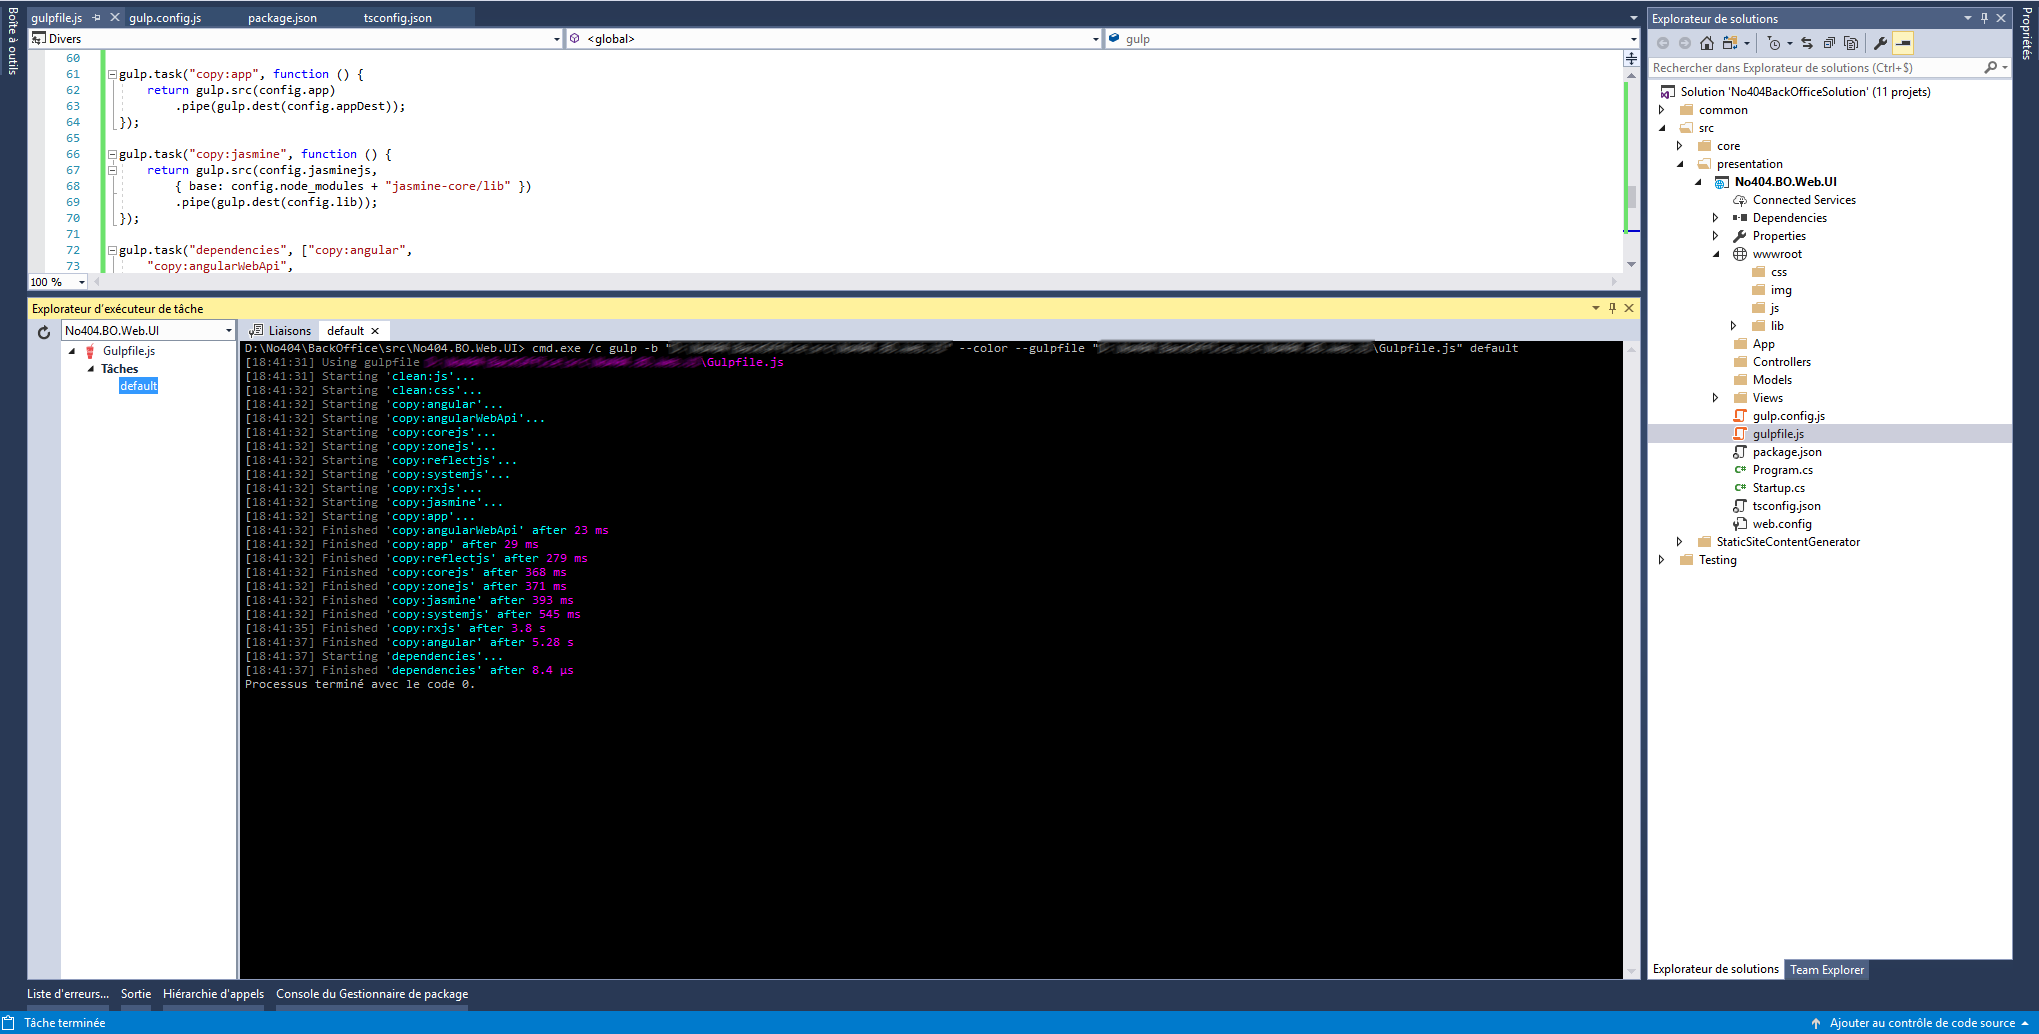
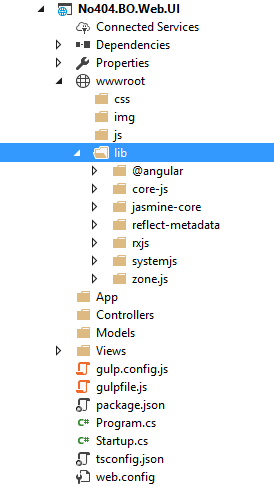
You can see that the dependencies has been added in the lib folder.
Add Bower
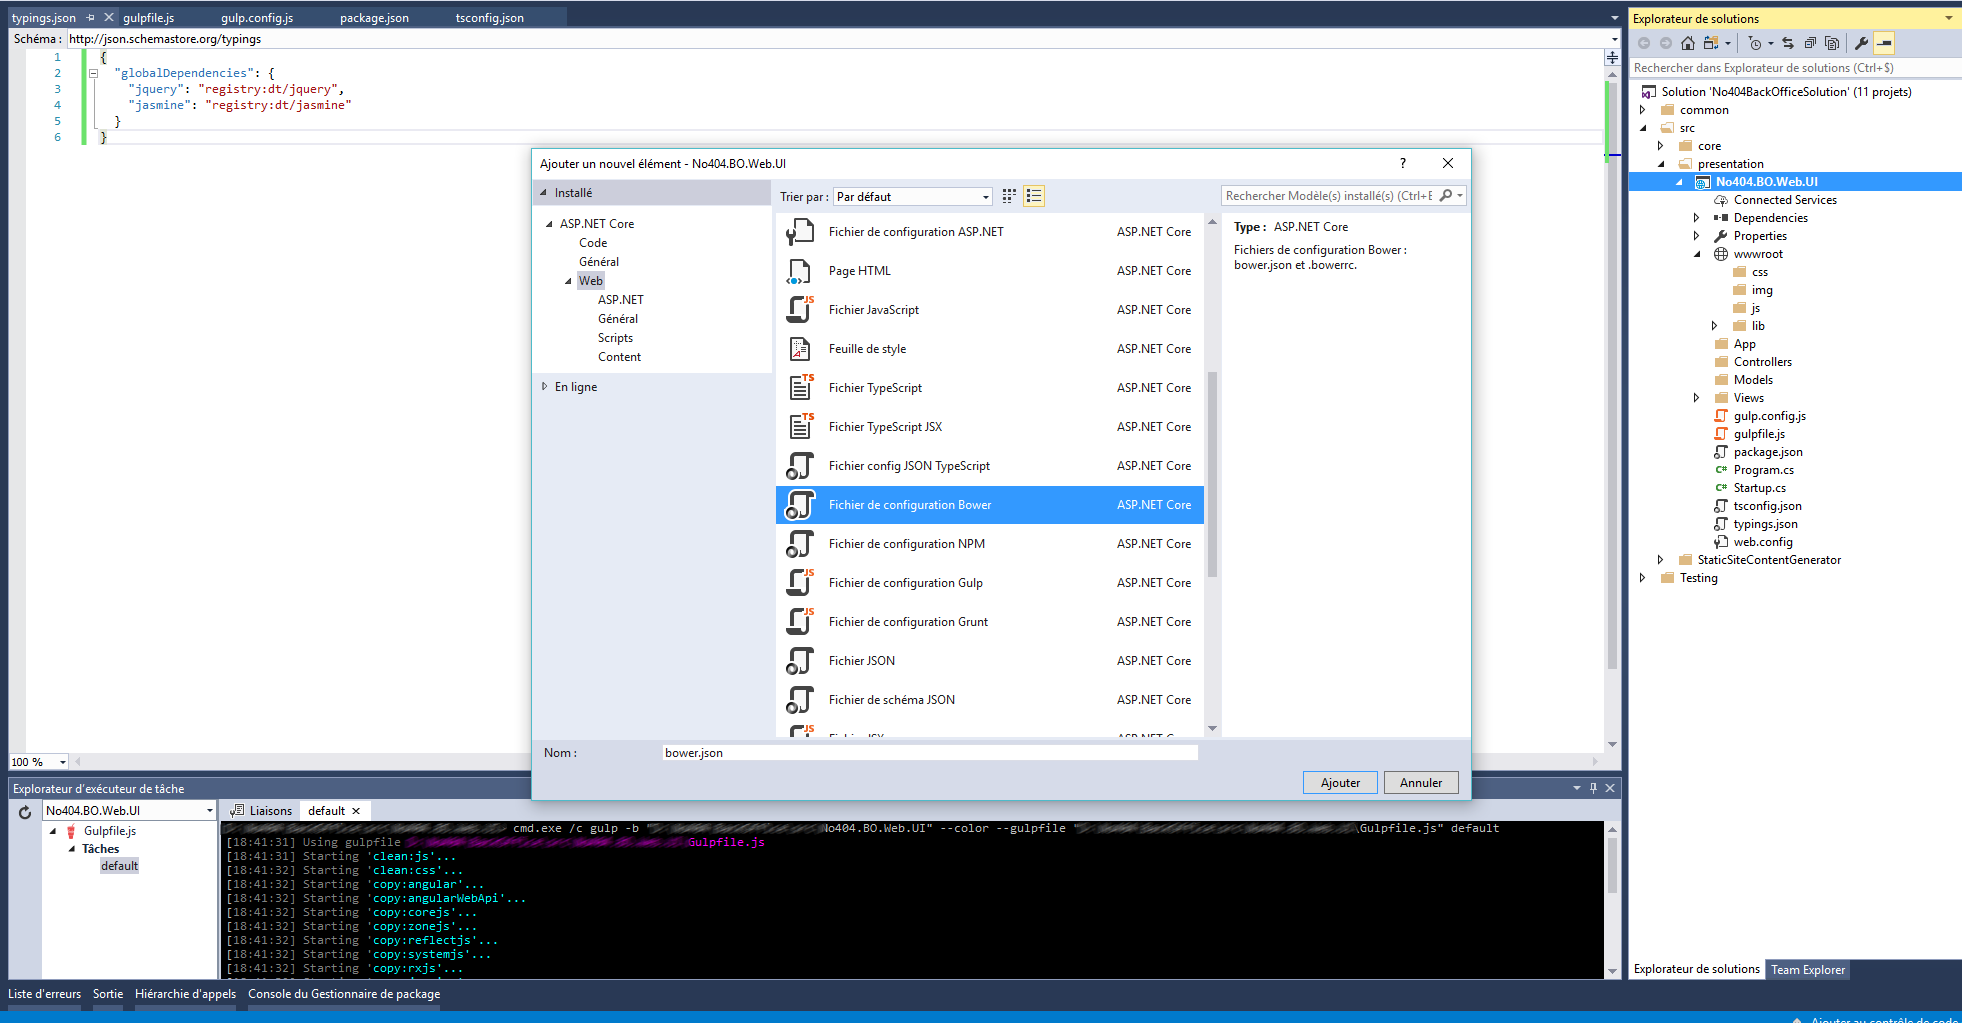
Add bower to add jquery and boostrap dependencies
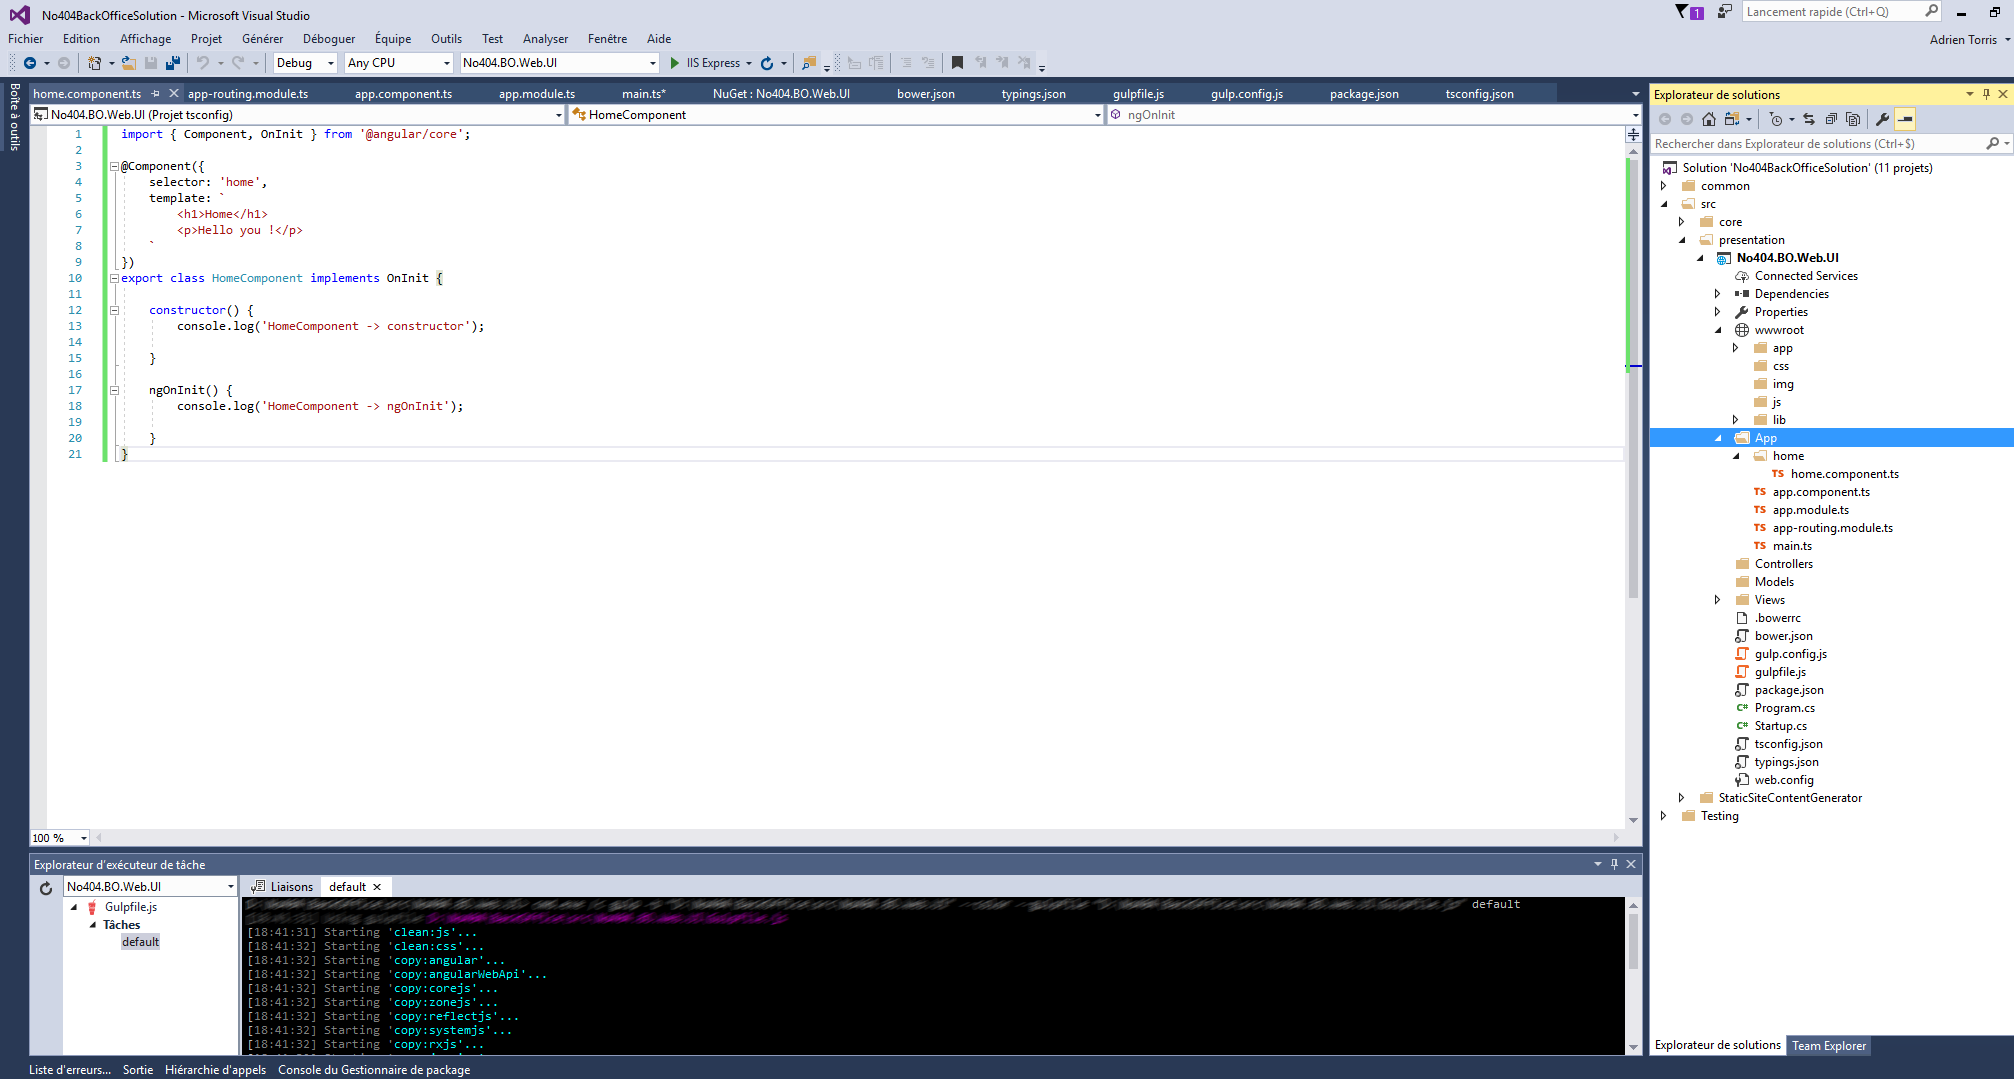
Create TypeScript app files
Create the main file to bootstrap your application
import { platformBrowserDynamic } from '@angular/platform-browser-dynamic';
import { AppModule } from './app.module';

const platform = platformBrowserDynamic();

platform.bootstrapModule(AppModule);
Add app.module.ts
import { NgModule } from '@angular/core';
import { BrowserModule } from '@angular/platform-browser';
import { HttpModule } from '@angular/http';

import { AppComponent } from './app.component';
import { HomeComponent } from './home/home.component';
import { AppRoutingModule } from './app-routing.module';

@NgModule({
    imports: [
        BrowserModule,
        HttpModule,
        AppRoutingModule
    ],
    declarations: [
        AppComponent,
        HomeComponent
    ],
    bootstrap: [AppComponent],
    providers: [
    ]
})
export class AppModule { }
Add app.component.ts
import { Component, OnInit } from '@angular/core';

@Component({
    selector: 'no404-bo-app',
    template: `
        <div class="container">
            <nav>
                <a routerLink="home" routerLinkActive="active">Home</a>
            </nav>
            <router-outlet></router-outlet>
        </div>
    `,
    providers: []
})
export class AppComponent implements OnInit {

    constructor() {
        console.log('AppComponent -> constructor');
    }

    ngOnInit() {
        console.log('AppComponent -> ngOnInit');
    }
}
Create the routing module (app-routing.module.ts)
import { NgModule } from '@angular/core';
import { Routes, RouterModule } from '@angular/router';
import { HomeComponent } from './home/home.component';

export const routes: Routes = [
    { path: '', redirectTo: 'home', pathMatch: 'full' },
    { path: 'home', component: HomeComponent }
];

@NgModule({
    imports: [RouterModule.forRoot(routes)],
    exports: [RouterModule]
})
export class AppRoutingModule { }
And add the home component
import { Component, OnInit } from '@angular/core';

@Component({
    selector: 'home',
    template: `
        <h1>Home</h1>
        <p>Hello you !</p>
    `
})
export class HomeComponent implements OnInit {

    constructor() {
        console.log('HomeComponent -> constructor');

    }

    ngOnInit() {
        console.log('HomeComponent -> ngOnInit');

    }
}
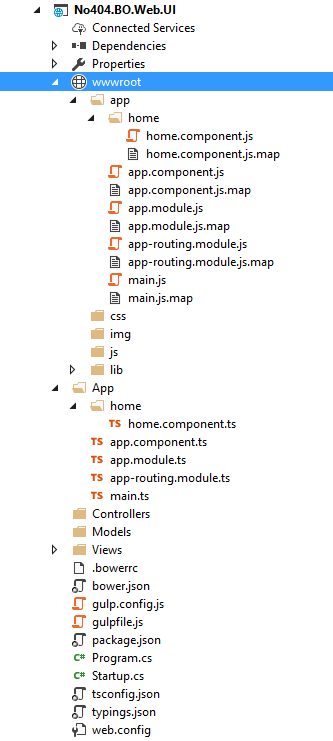
If you build your solution, you can see that your outpout app folder has been populated with some javascript files generated by your TypeScript files.
If you launch your website, you will have something like this :
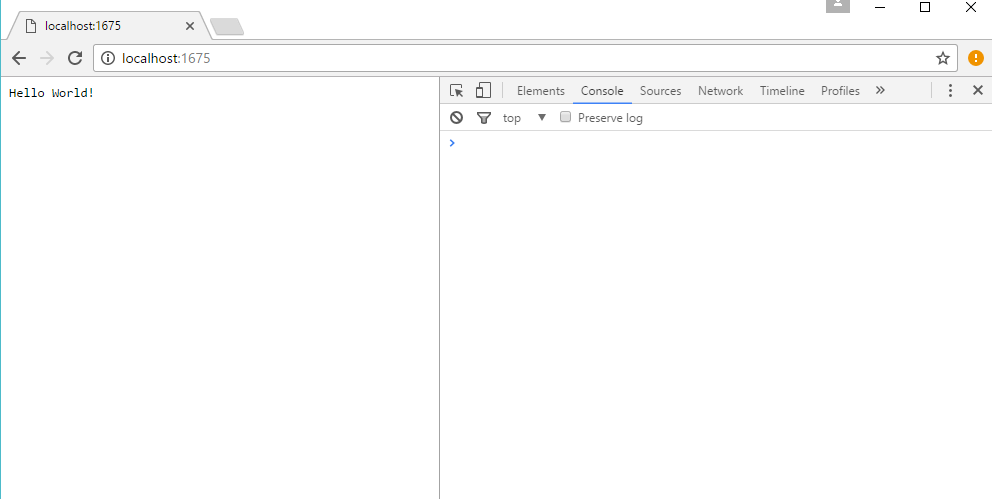
No trace in the console and not the content in our typescript templates. Why ? Cause we have to tell our website startup that we want to load our typescript application.
Configure your web app to dispay your angular application
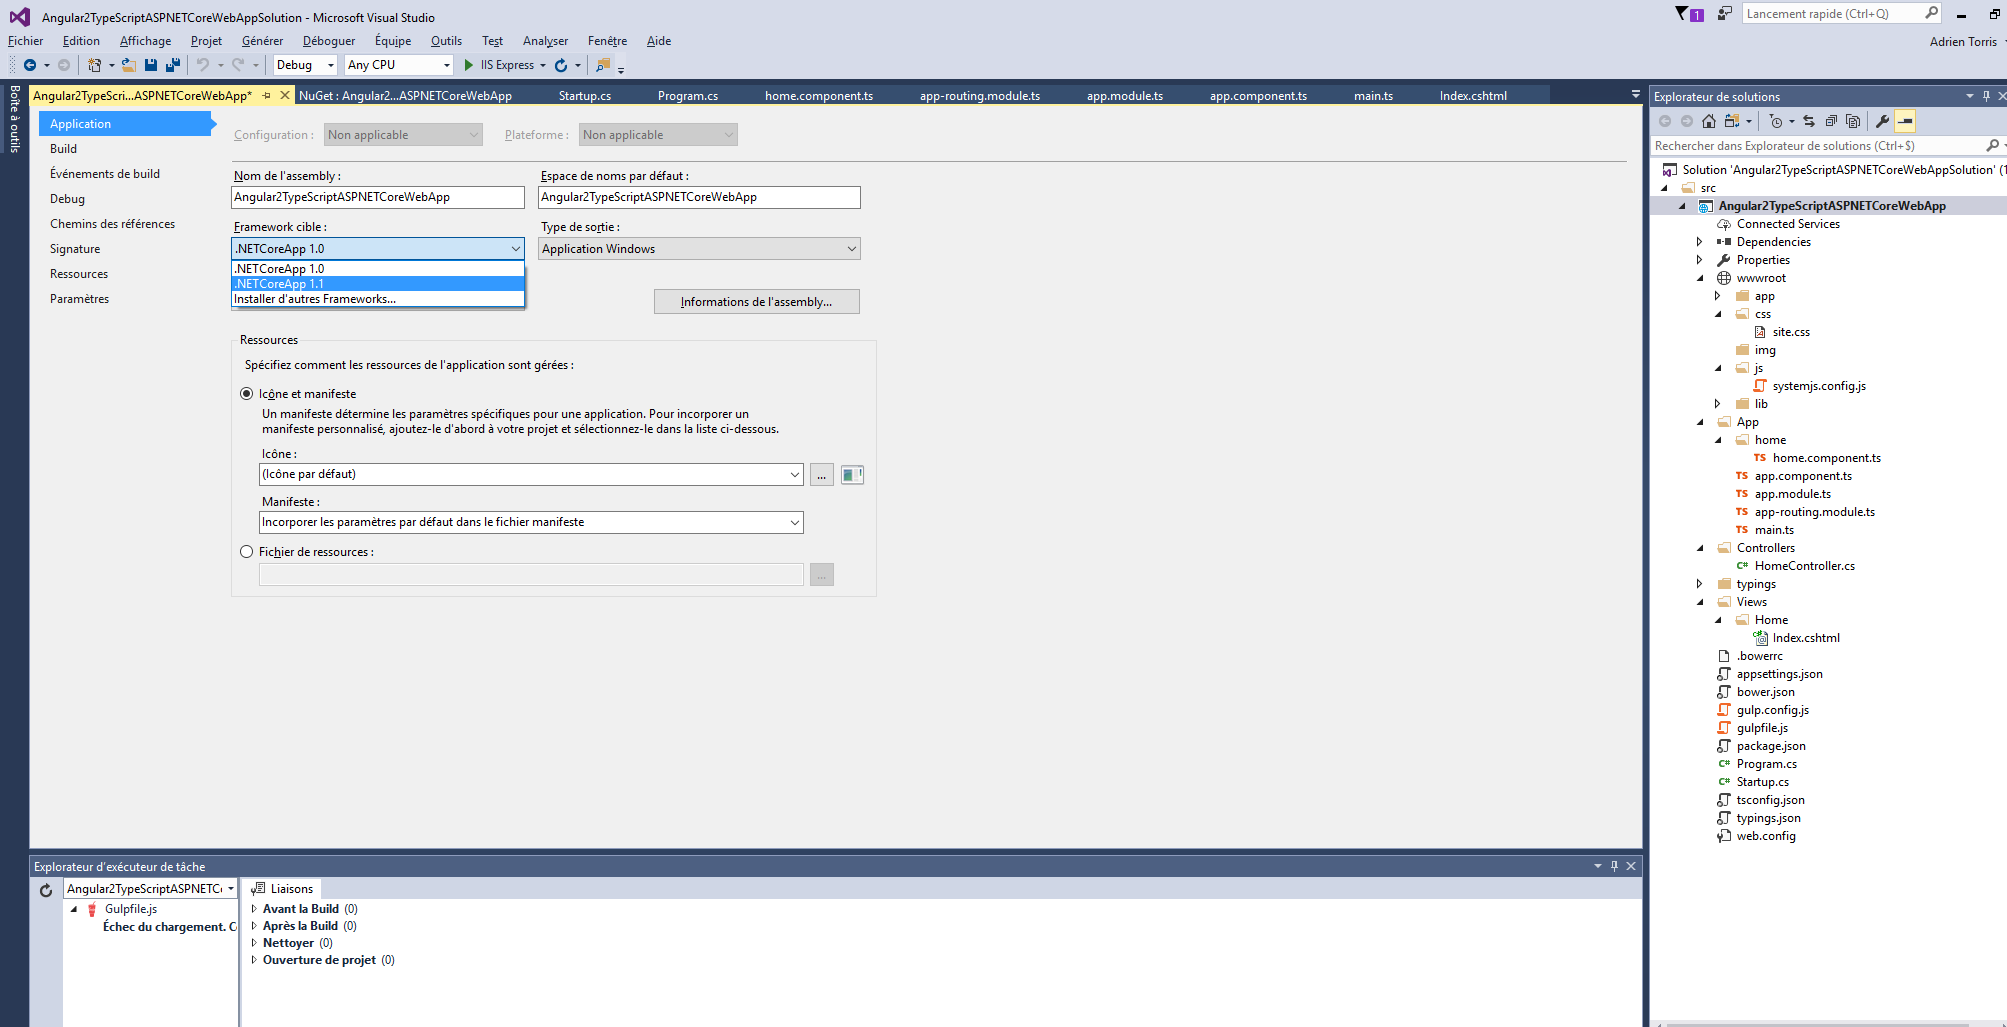
Check if your application is targeting the .NETCoreApp framework, version 1.1, if not update it.
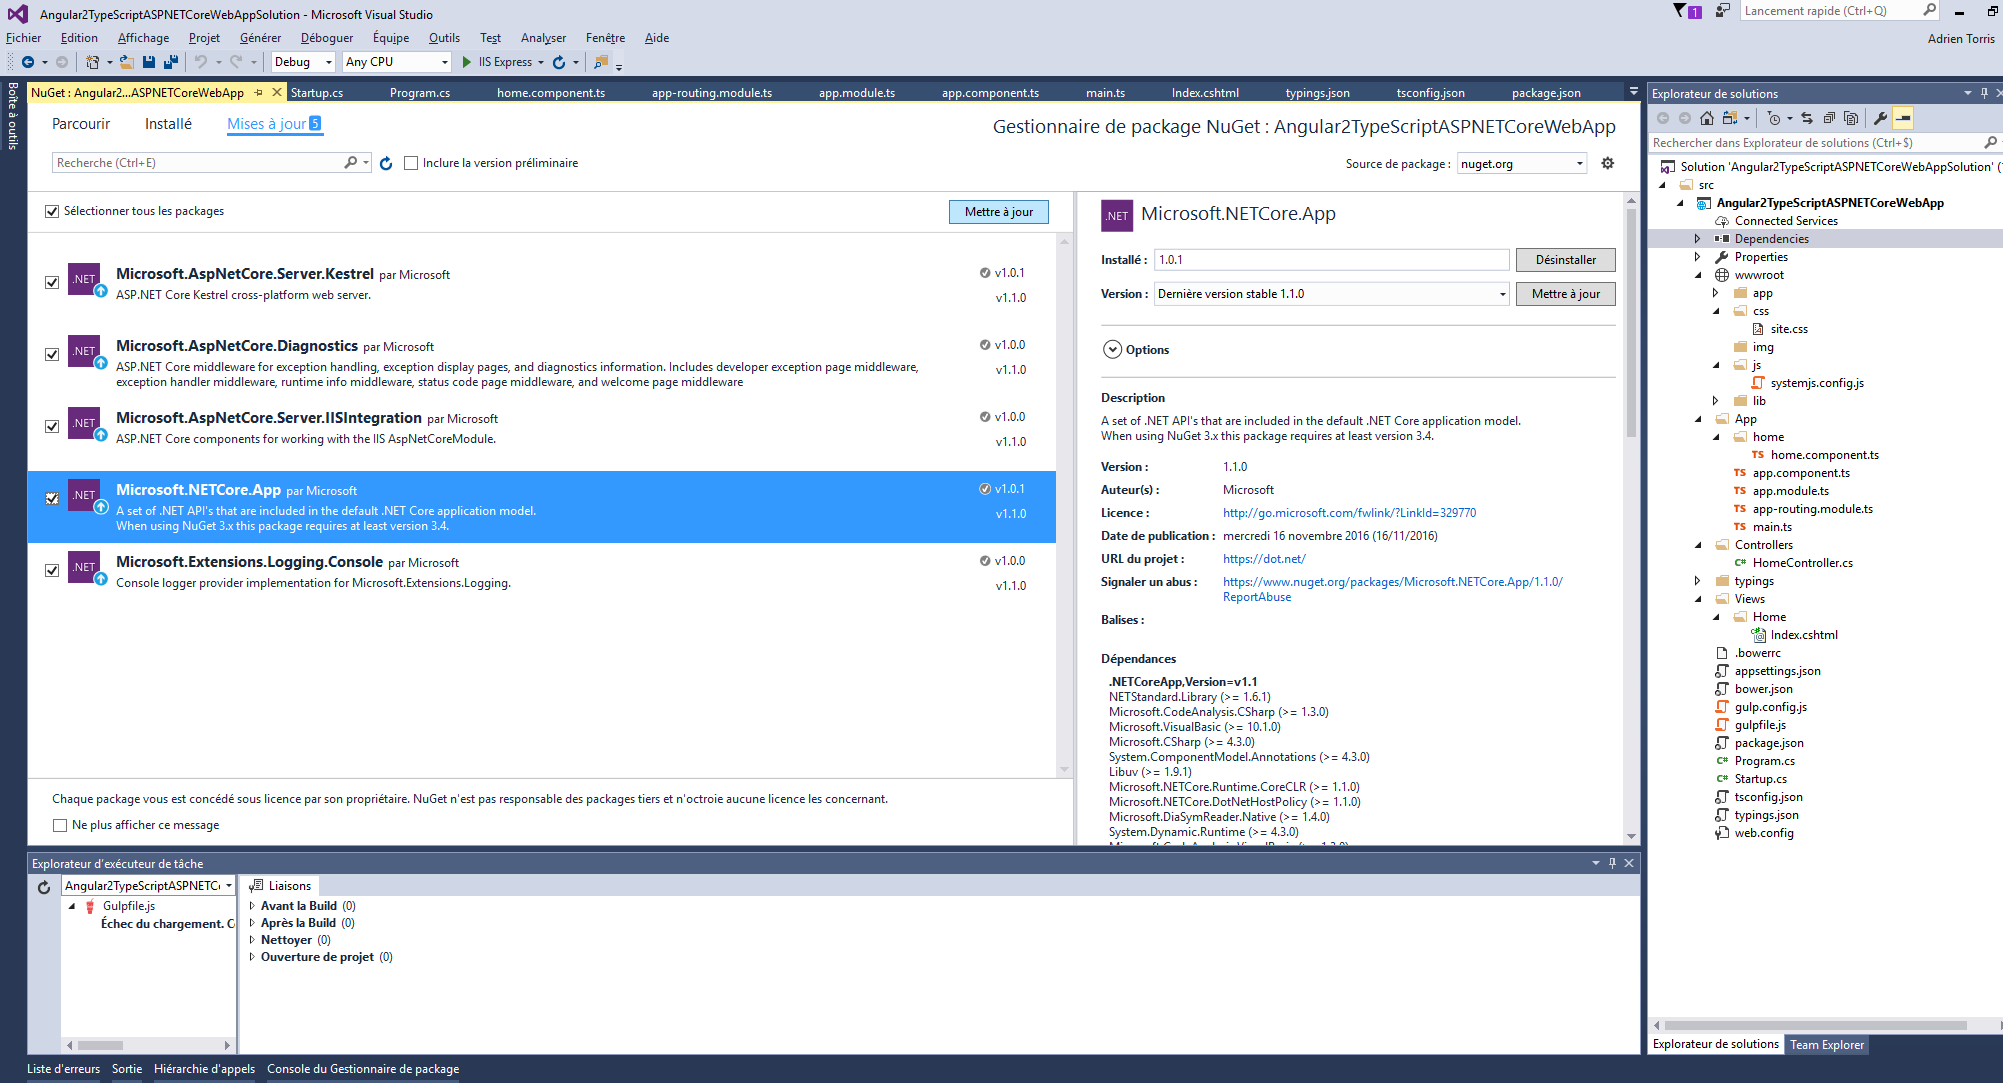
Check if the Nuget dependencies are targeting the last version, if not update them all.
Add the Nuget dependencies you need :
- Microsoft.AspNetCore.Mvc
- Microsoft.AspNetCore.StaticFiles
- Microsoft.Extensions.Logging.Debug
- Microsoft.Extensions.Configuration.Json
Microsoft.AspNetCore.StaticFiles is a middleware for handling requests for file system resources including files and directories that enable your application to serve HTML and javascript files, indispensable elements of an Angular application.
For more information about Microsoft.AspNetCore.StaticFiles, you can see :
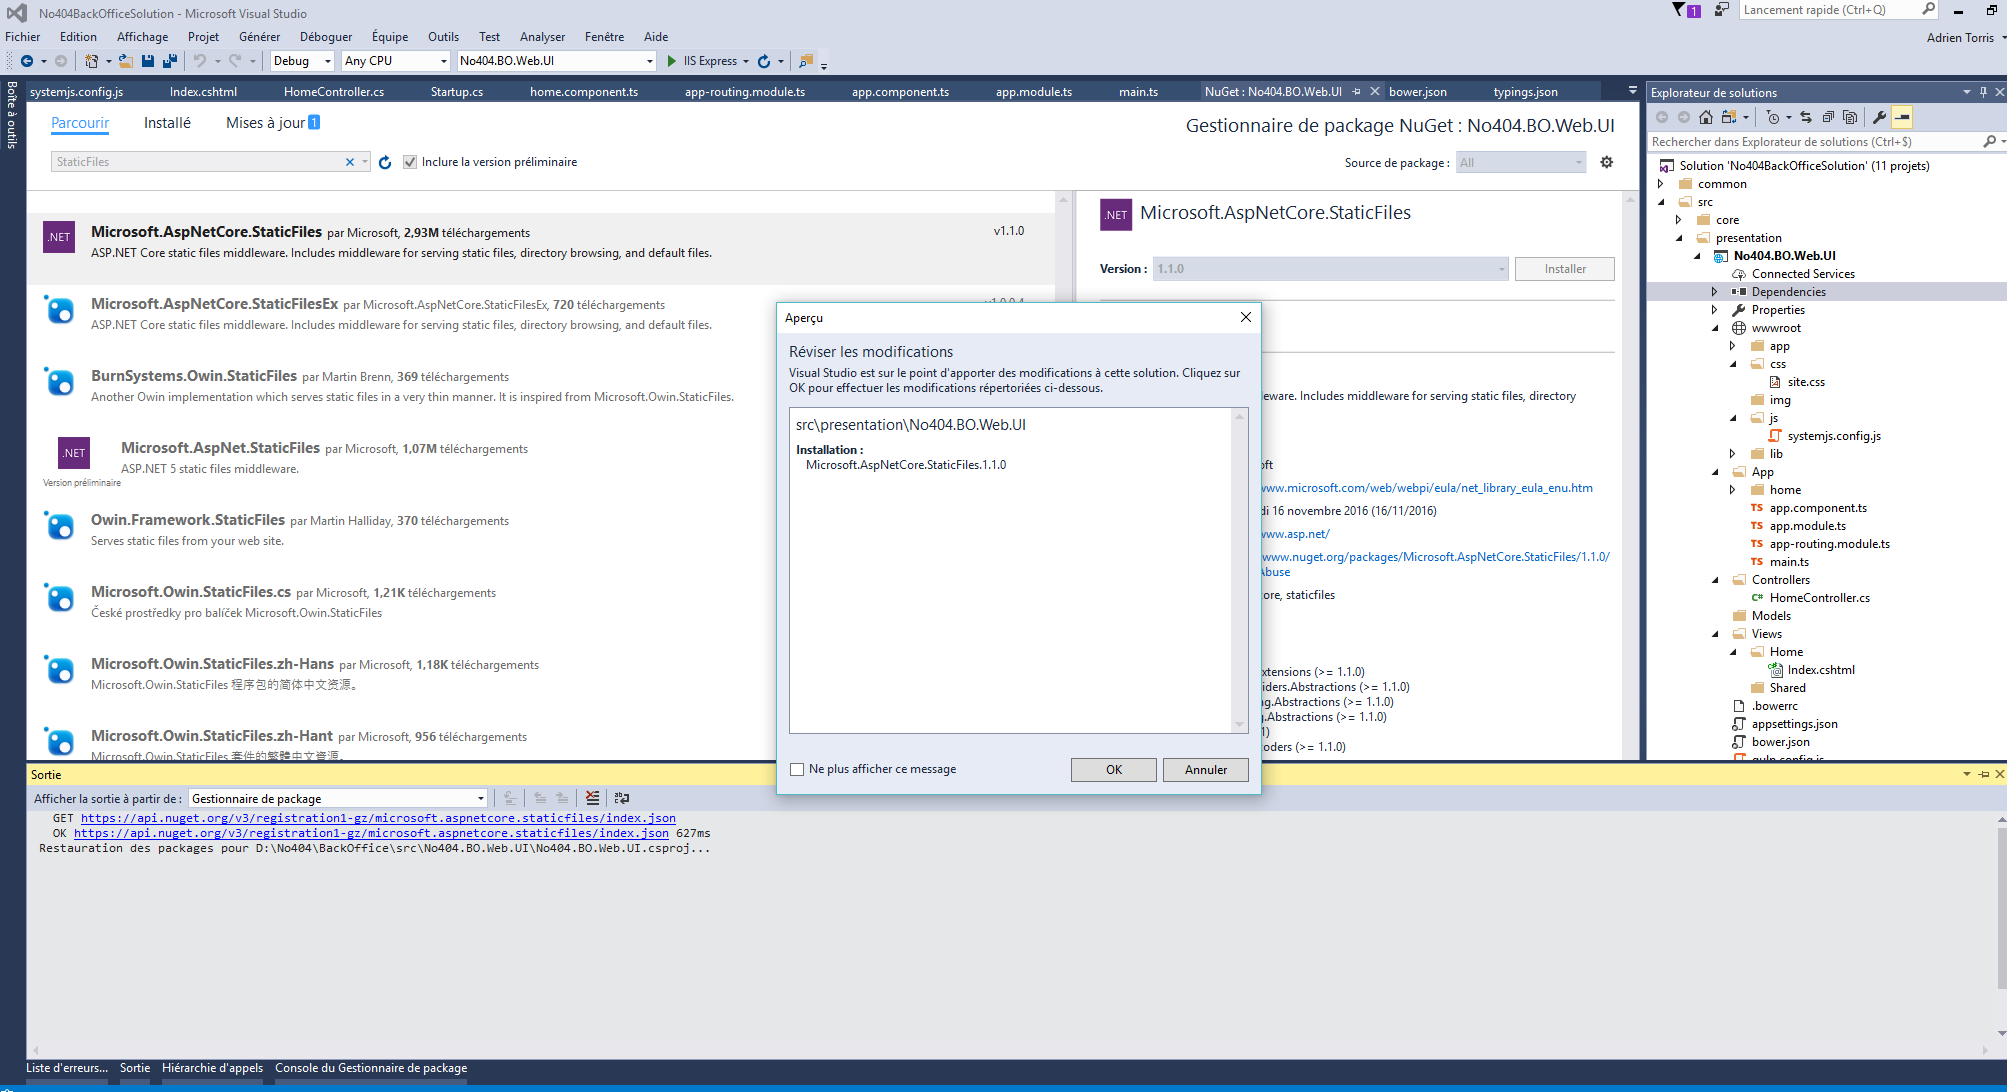
Once you have added the Microsoft.AspNetCore.StaticFiles package, you have to enable your app to serve static files. It occurs in the Configure method in the startup class, using app.UseStaticFiles():.
public void ConfigureServices(IServiceCollection services)
{
    services
               .AddMvc()
               .AddJsonOptions(options => options.SerializerSettings.ContractResolver =
                   new DefaultContractResolver());
}

public void Configure(IApplicationBuilder app, IHostingEnvironment env, ILoggerFactory loggerFactory)
{
    loggerFactory.AddConsole(Configuration.GetSection("Logging"));
    loggerFactory.AddDebug();

    app.UseCors(
        builder => builder.AllowAnyOrigin()
            .AllowAnyHeader()
            .AllowAnyMethod()
            .AllowCredentials())
        .UseStaticFiles();

    app.UseMvc(routes =>
    {
        routes.MapRoute(
            name: "default",
            template: "{controller=Home}/{action=Index}/{id?}");
    });
}
Add the Home controller with the view
Add HomeController and Index.cshtml in the home folder of the Views.
Add systemjs.config.js javascript file in your js folder of the wwwroot folder.
(function (global) {
    System.config({
        paths: {
            'npm:': 'lib/'
        },
        map: {
            app: 'app',
            '@angular/core': 'npm:@angular/core/bundles/core.umd.js',
            '@angular/common': 'npm:@angular/common/bundles/common.umd.js',
            '@angular/compiler': 'npm:@angular/compiler/bundles/compiler.umd.js',
            '@angular/platform-browser': 'npm:@angular/platform-browser/bundles/platform-browser.umd.js',
            '@angular/platform-browser-dynamic': 'npm:@angular/platform-browser-dynamic/bundles/platform-browser-dynamic.umd.js',
            '@angular/http': 'npm:@angular/http/bundles/http.umd.js',
            '@angular/router': 'npm:@angular/router/bundles/router.umd.js',
            '@angular/forms': 'npm:@angular/forms/bundles/forms.umd.js',
            'rxjs': 'npm:rxjs',
            'angular-in-memory-web-api': 'npm:angular-in-memory-web-api/bundles/in-memory-web-api.umd.js'
        },
        packages: {
            app: {
                main: './main.js',
                defaultExtension: 'js'
            },
            rxjs: {
                defaultExtension: 'js'
            },
            'angular2-in-memory-web-api': {
                main: './index.js',
                defaultExtension: 'js'
            }
        }
    });
})(this);
Set up the content of your Index.cshtml view to load the ui dependencies your need, and load your Angular application.
<!DOCTYPE html>
<html>
<head>
    <base href="/">
    <meta charset="utf-8" />
    <meta name="viewport" content="width=device-width, initial-scale=1.0" />

    <link rel="stylesheet" href="~/lib/bootstrap/dist/css/bootstrap.css" />
    <link rel="stylesheet" href="~/css/site.css" />

    <script src="~/lib/jquery/dist/jquery.js"></script>
    <script src="~/lib/bootstrap/dist/js/bootstrap.js"></script>

    <script src="~/lib/core-js/client/shim.js"></script>
    <script src="~/lib/zone.js/dist/zone.js"></script>
    <script src="~/lib/reflect-metadata/Reflect.js"></script>
    <script src="~/lib/systemjs/dist/system.src.js"></script>

    <script src="~/js/systemjs.config.js"></script>
    <script>
      System.import('app').catch(function(err){ console.error(err); });
    </script>
</head>
<body>
    <div class="container">
        <no404-bo-app>Loading...</no404-bo-app>
    </div>
</body>
</html>
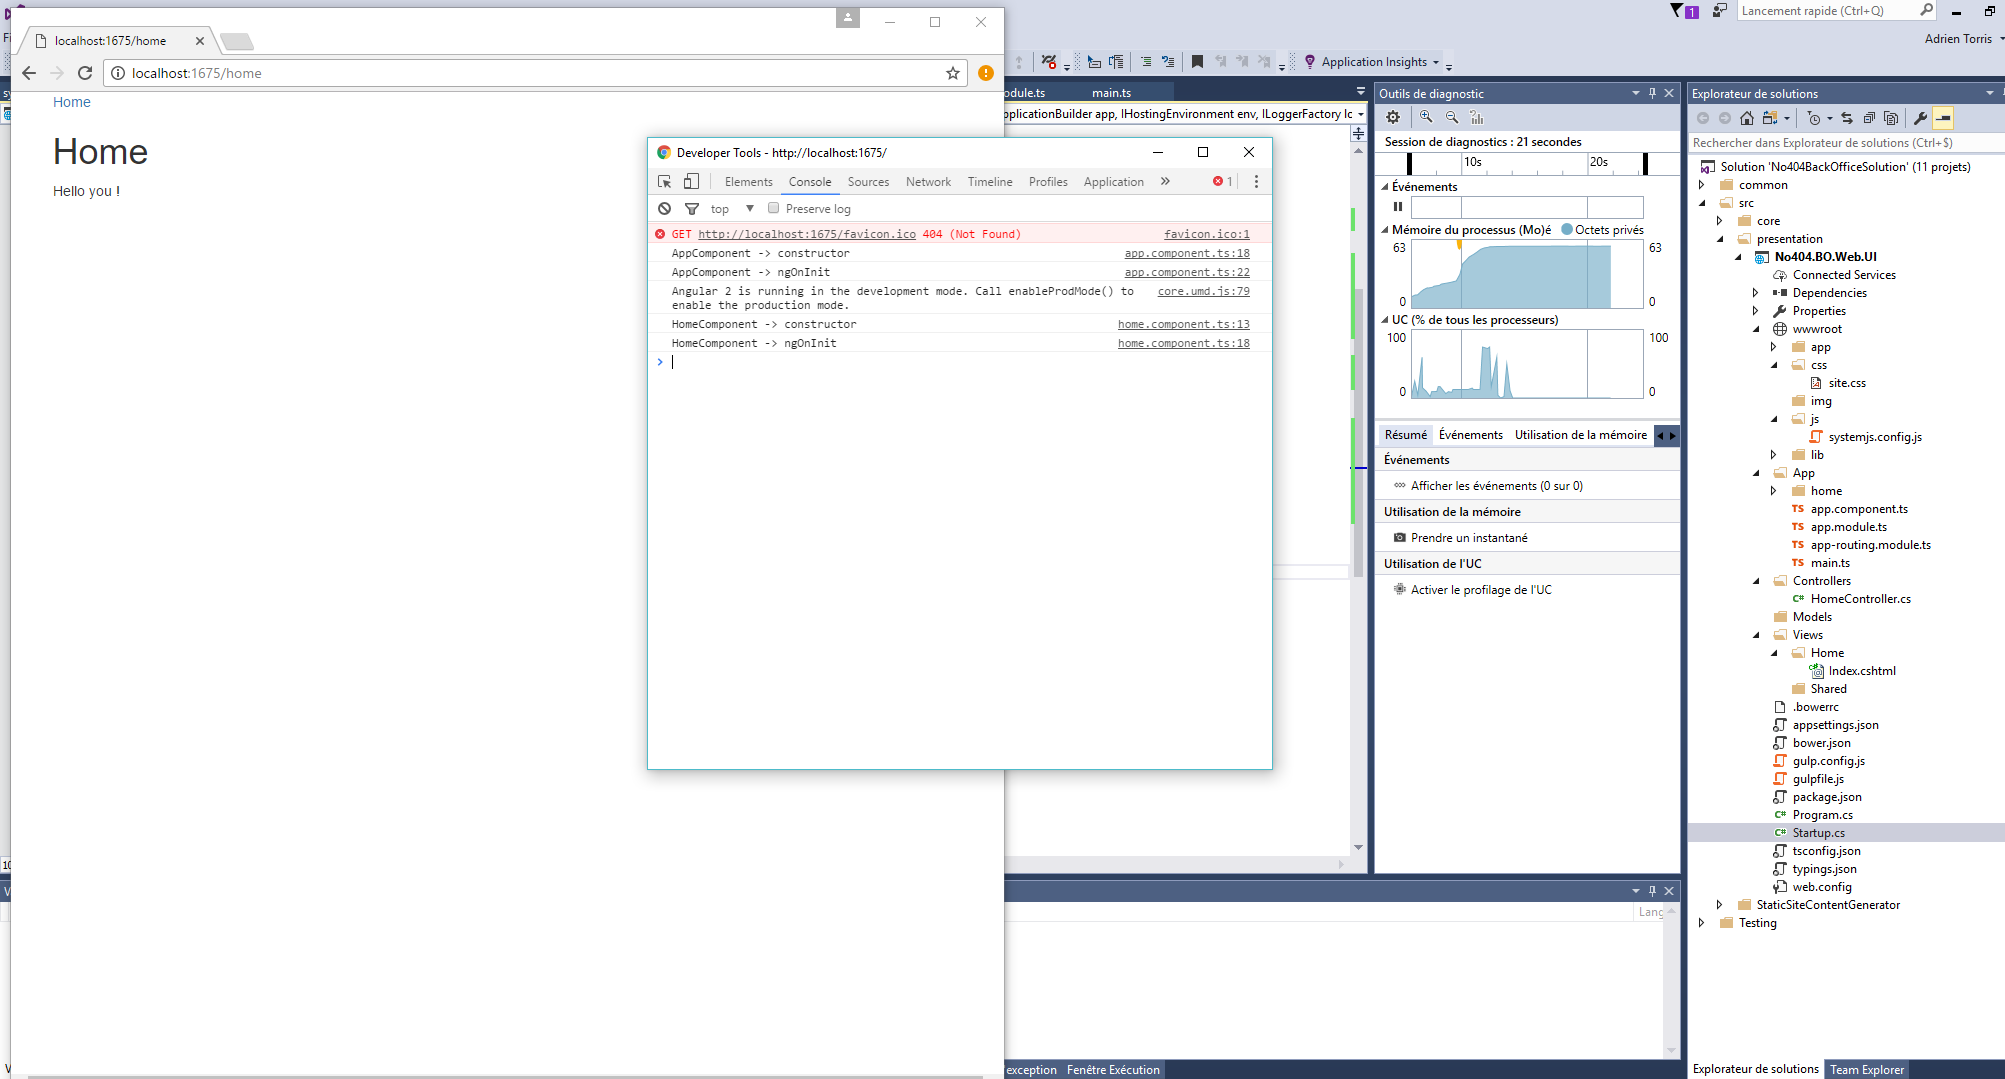
And it's work !
If you launch your application now, you can see that all is working and your Angular 2 application is correctly loaded.
You can now implement your Angular 2 application to do what you have to do. Enjoy :)
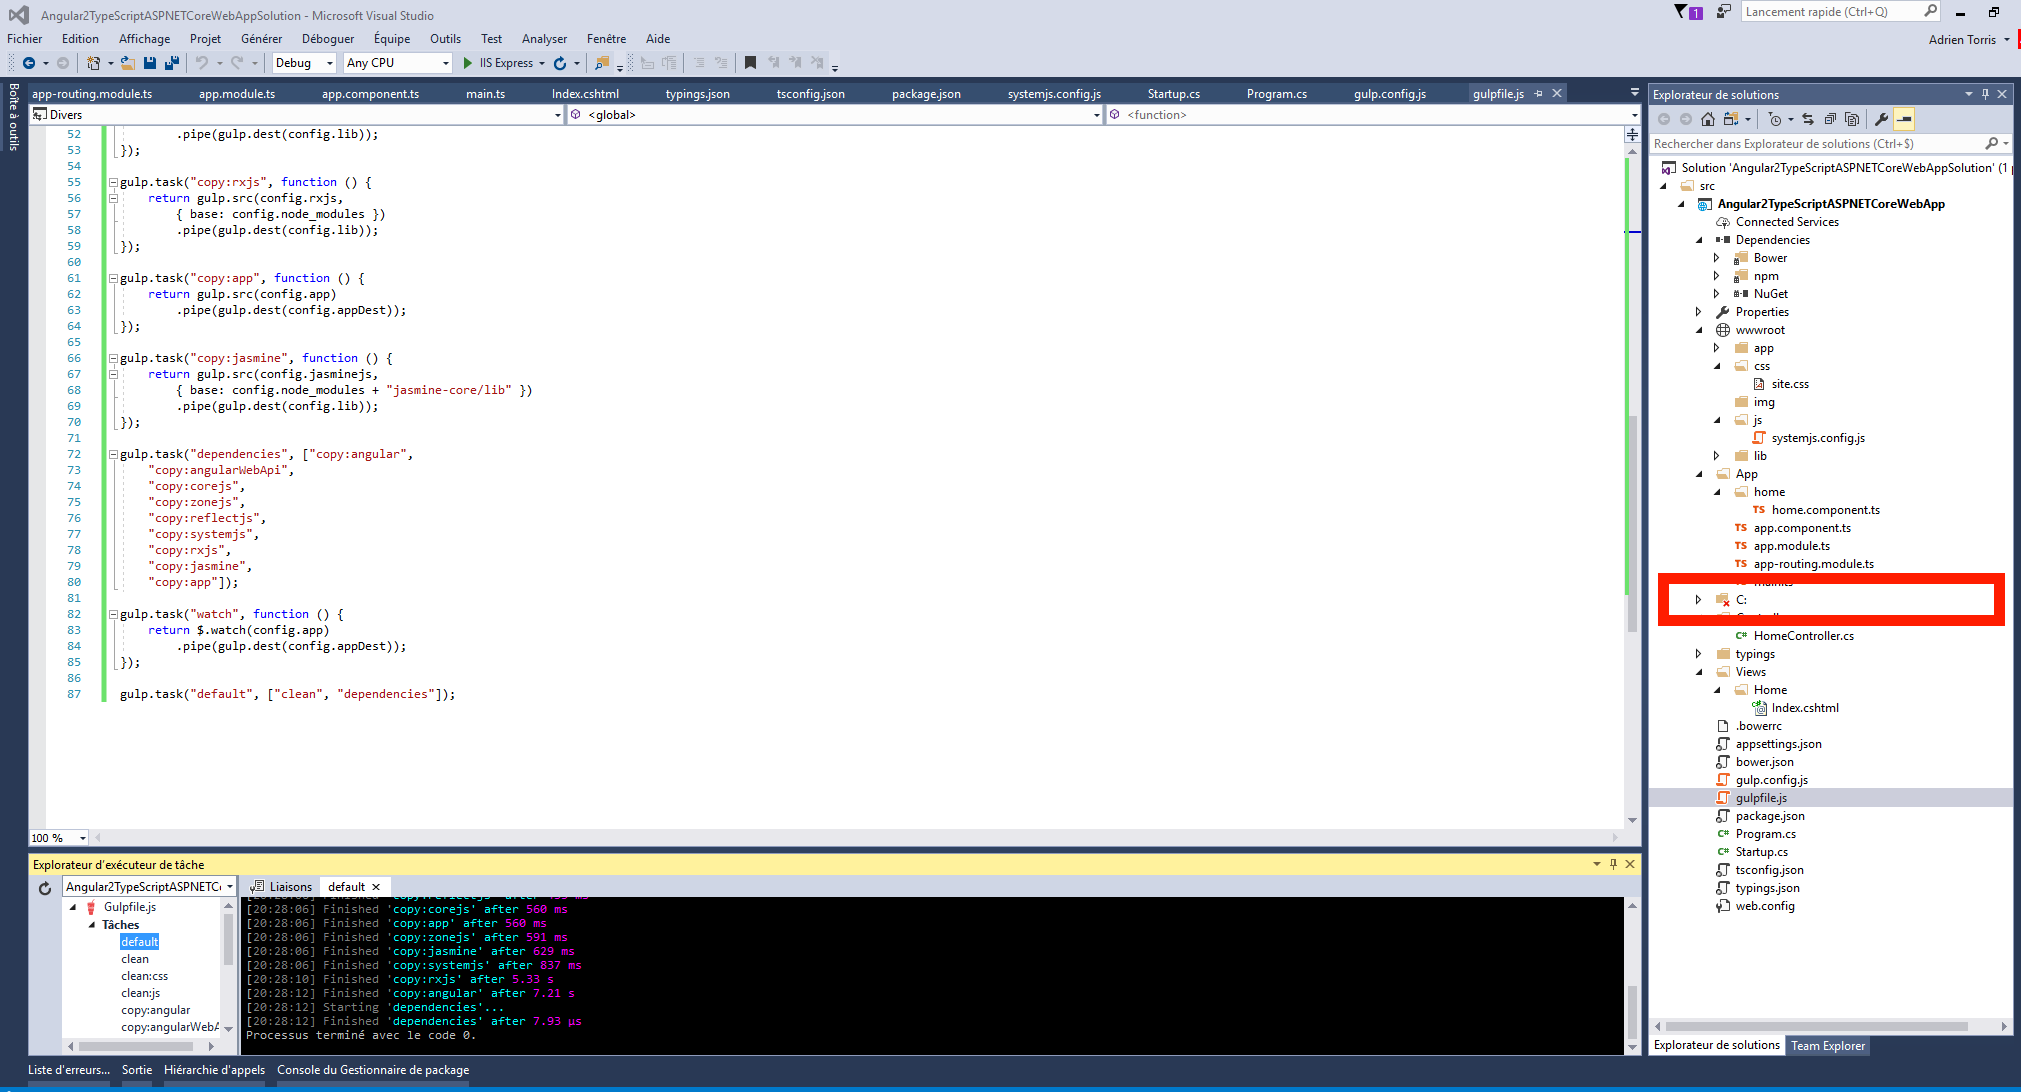
PS: If you see a strange C folder appearing in your solution, follow this tutorial : Update ASP.NET Core web application to .NETCoreApp1.1 causes a project loading failure
